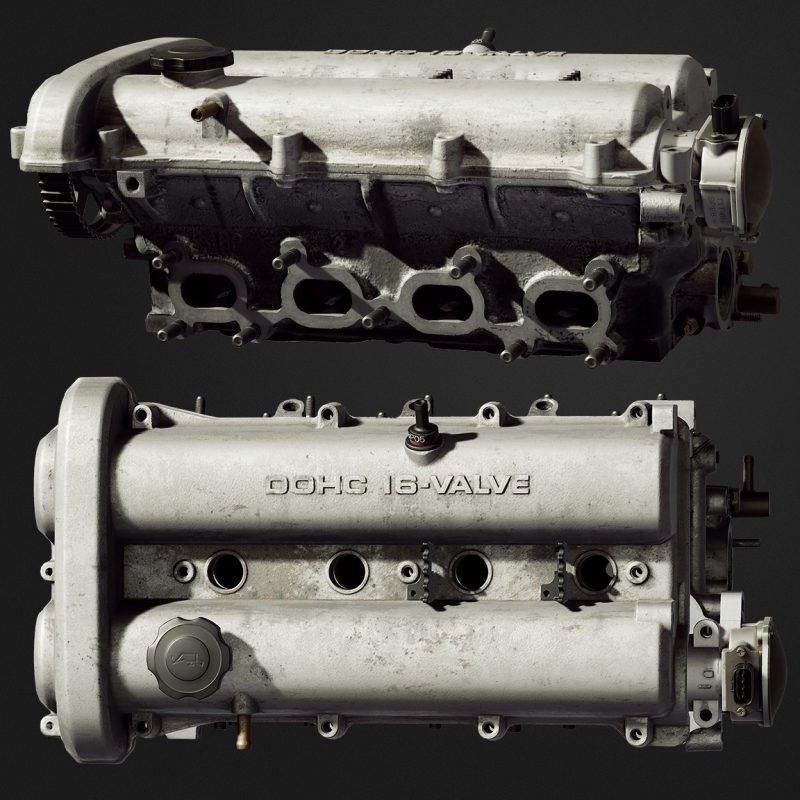
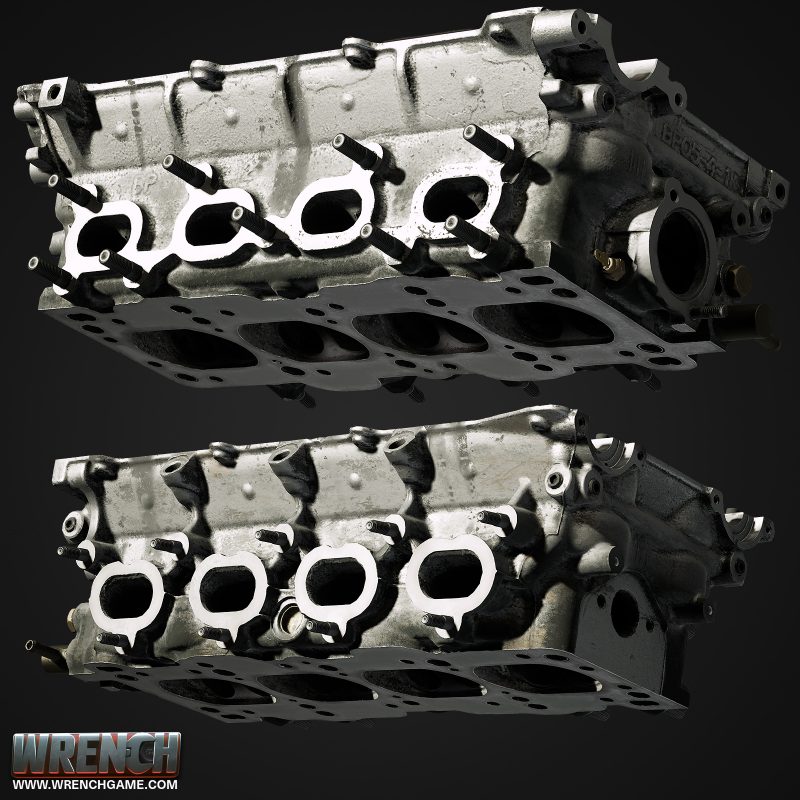
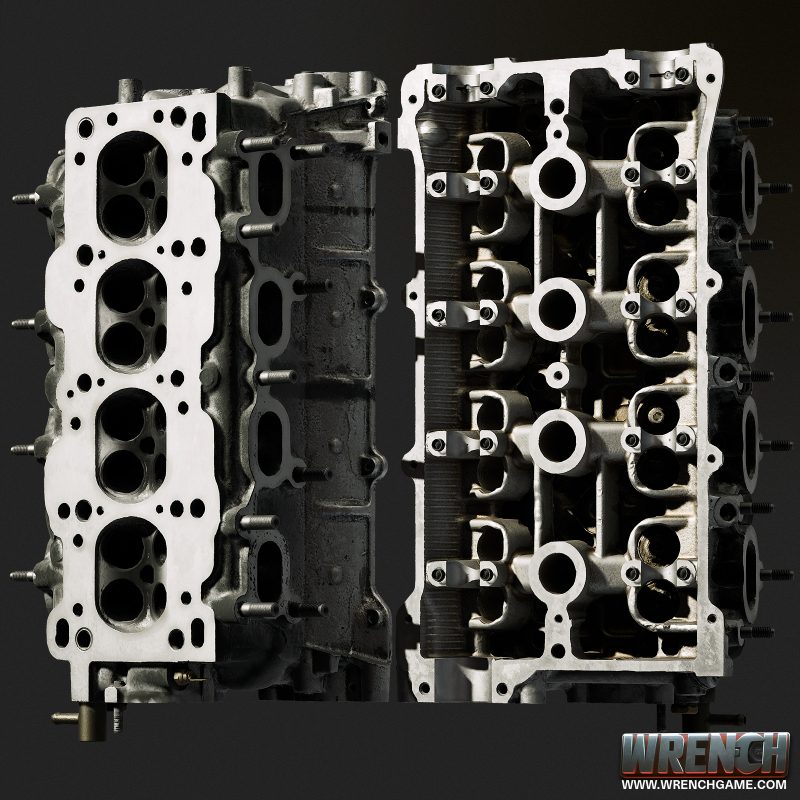
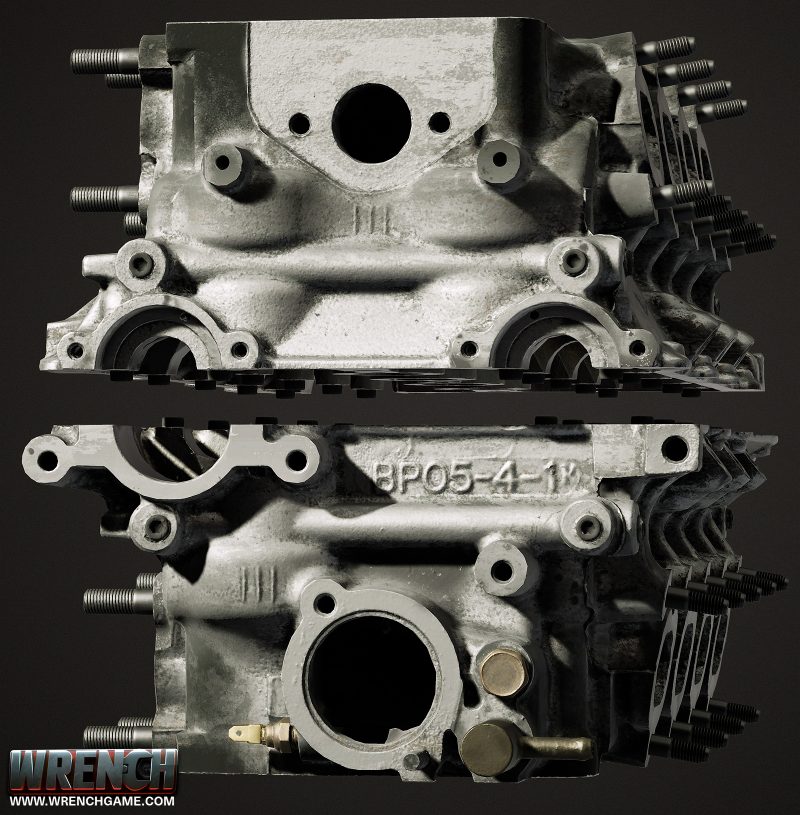
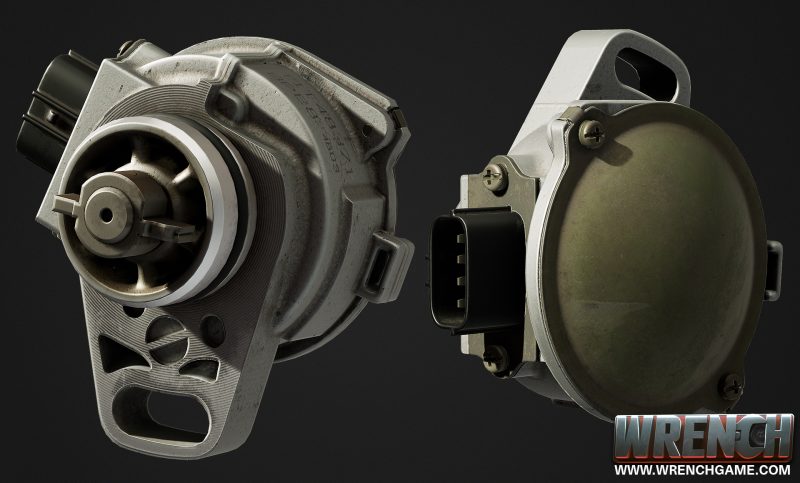
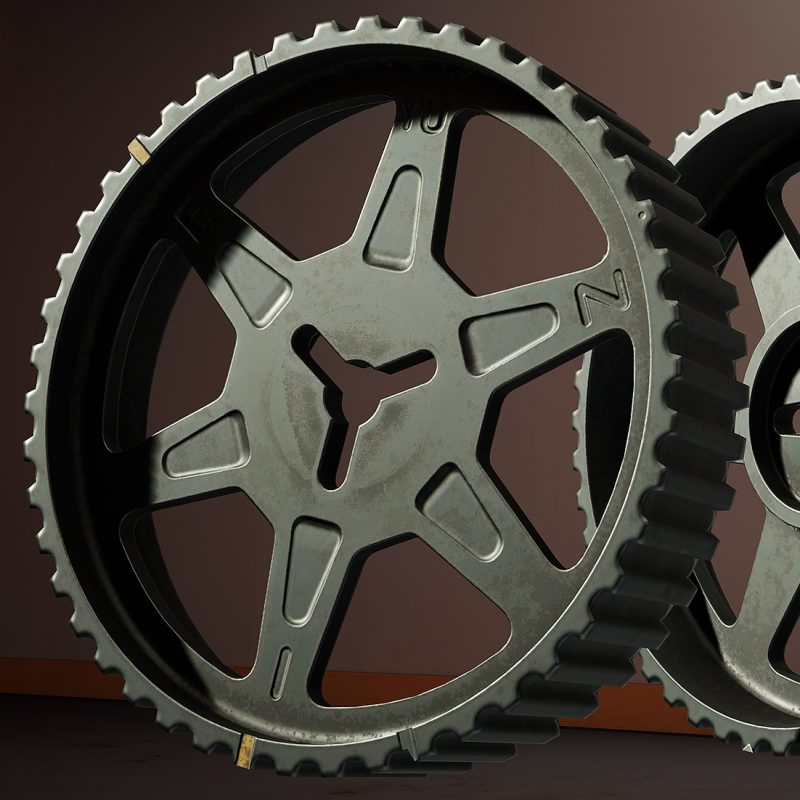
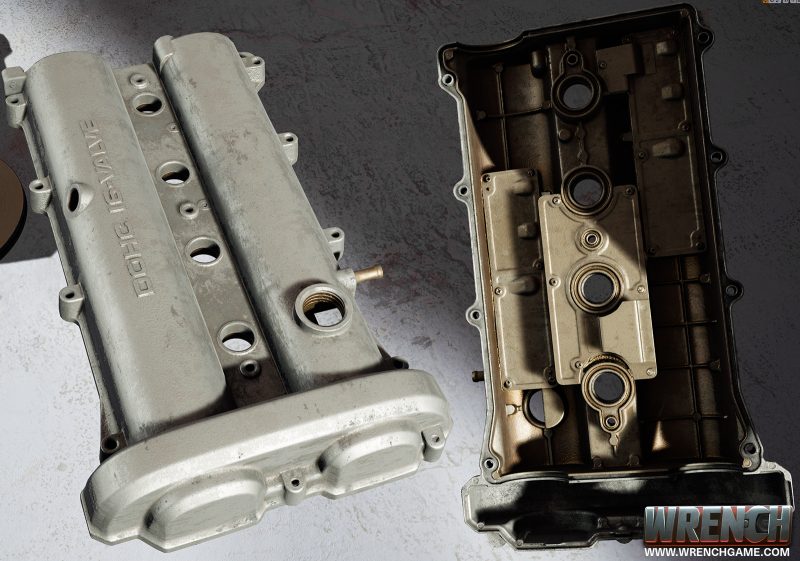
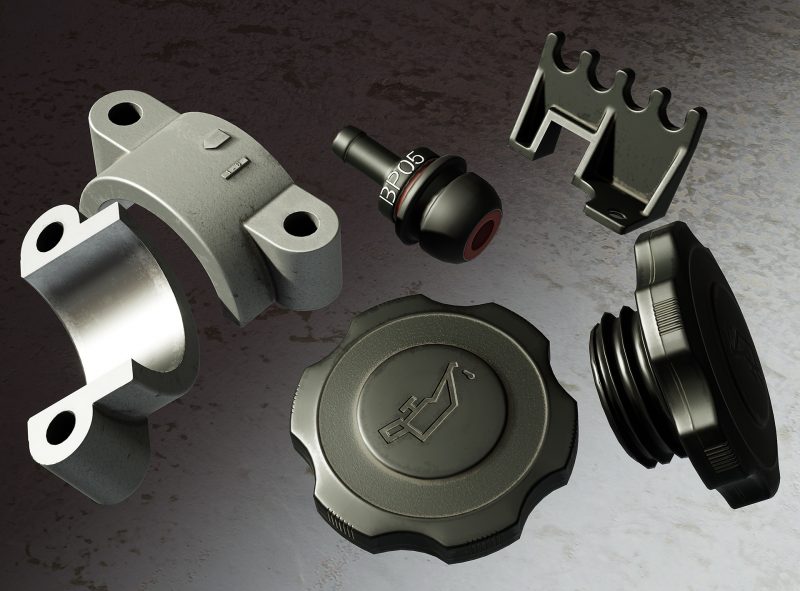
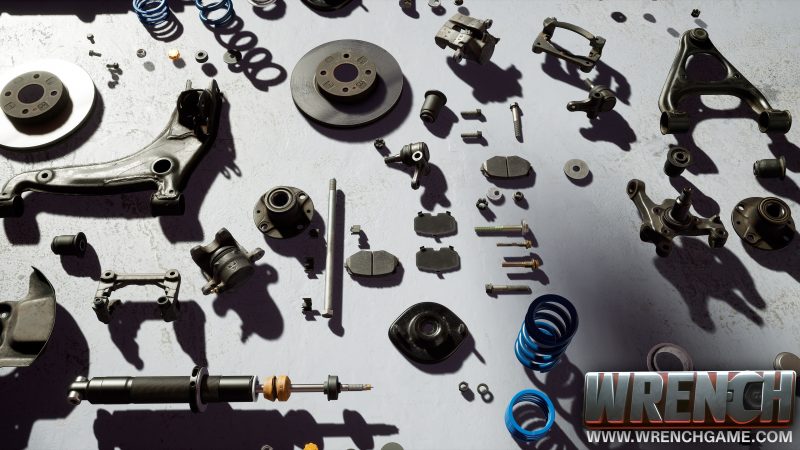
I have been making good progress on engine parts. This is most of the components for the cylinder head. All images are in game screenshots. Click for full size images:
Blog
Using VR to iterate on physical designs
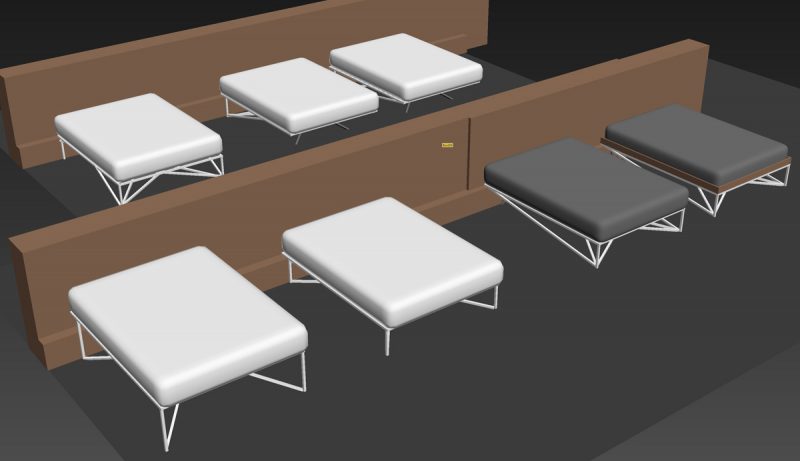
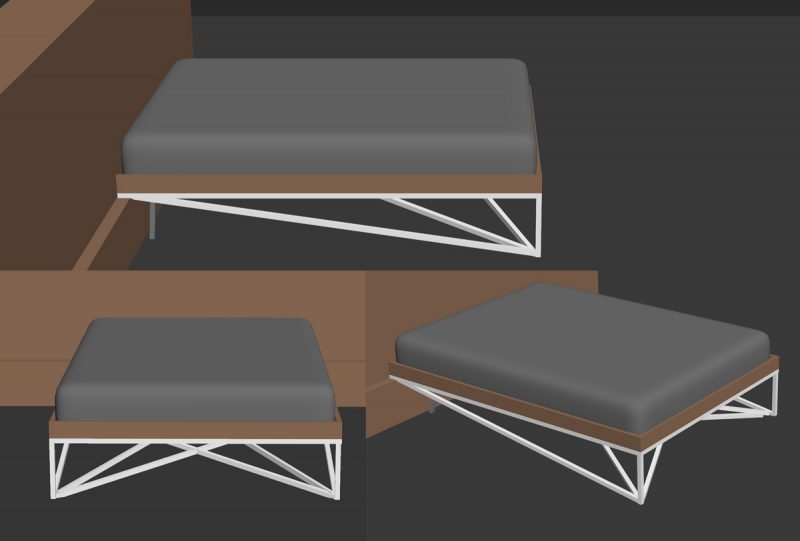
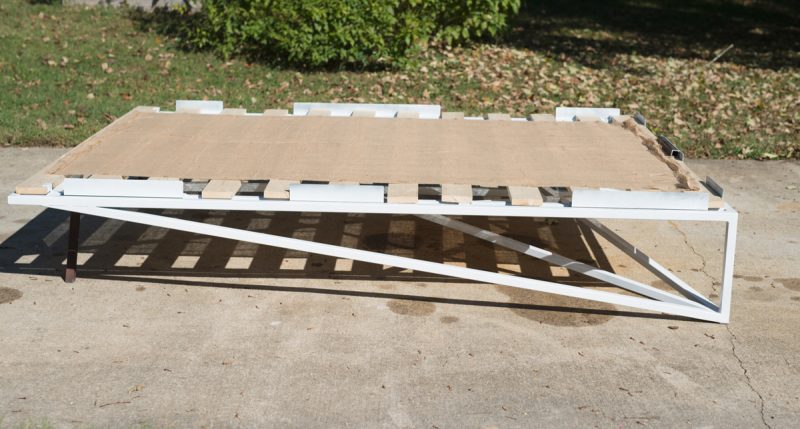
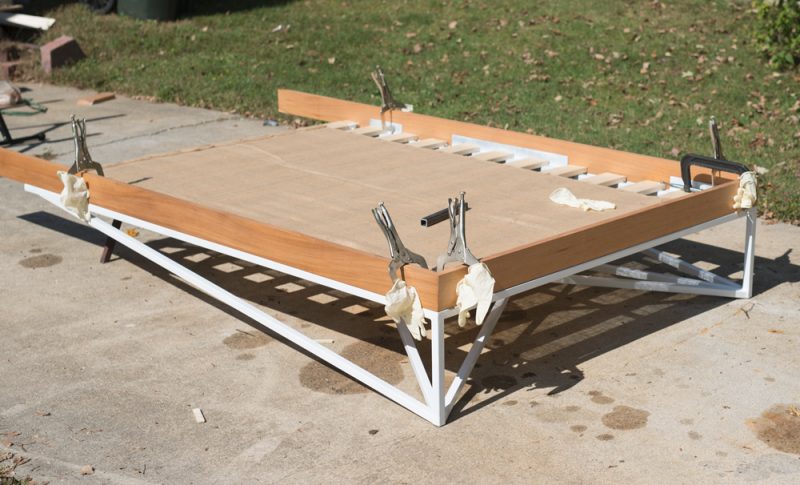
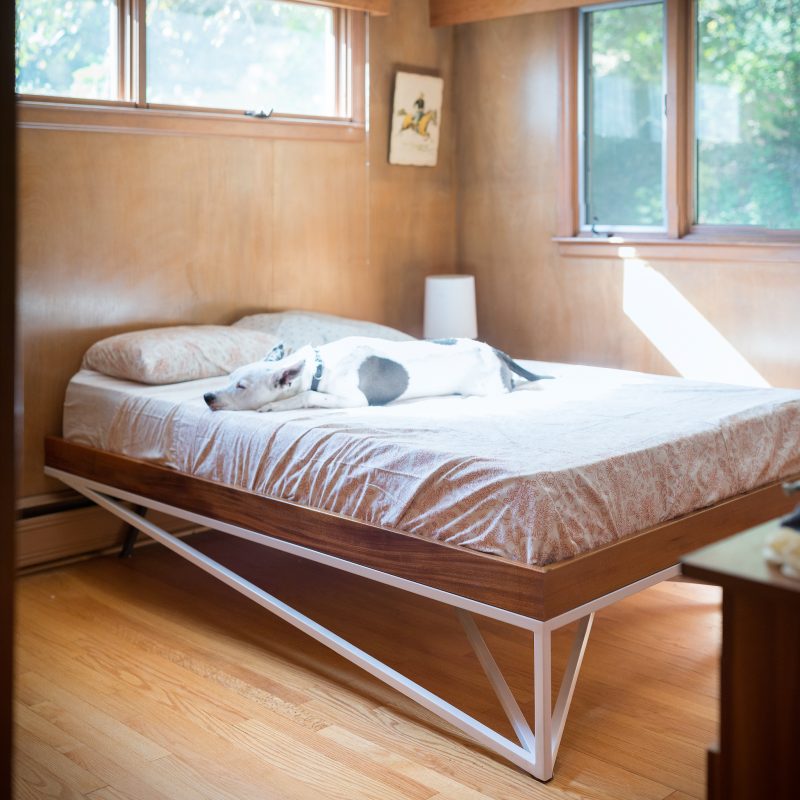
I spent my last few weekends building a new bed frame and took the opportunity to use VR to iterate on different design sketches. This image shows some of the ideas I brought into Unreal to evaluate. A few were clearly too tall, or only interesting from an unrealistically low viewing angle. Eventually I settled on the design with the wood trim and hidden rear legs. This bed frame is reasonably light and very stiff, thanks to the semi space frame design.
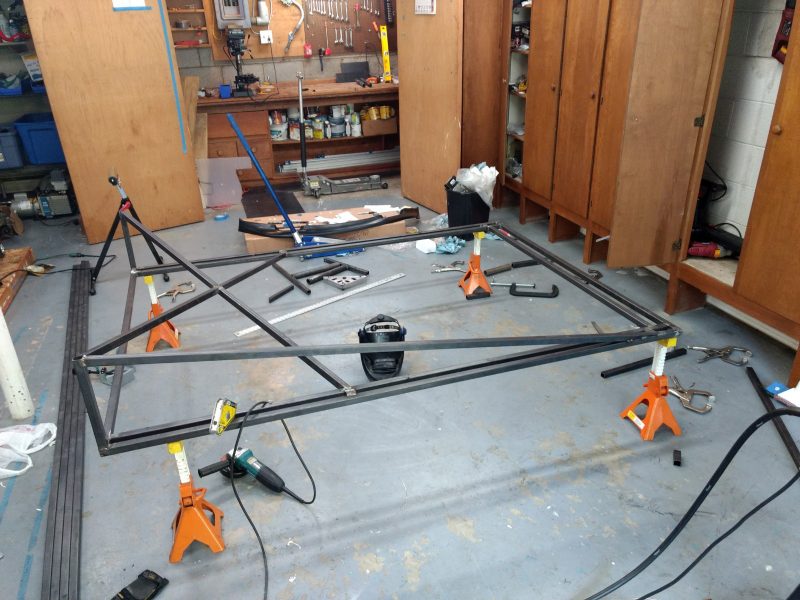
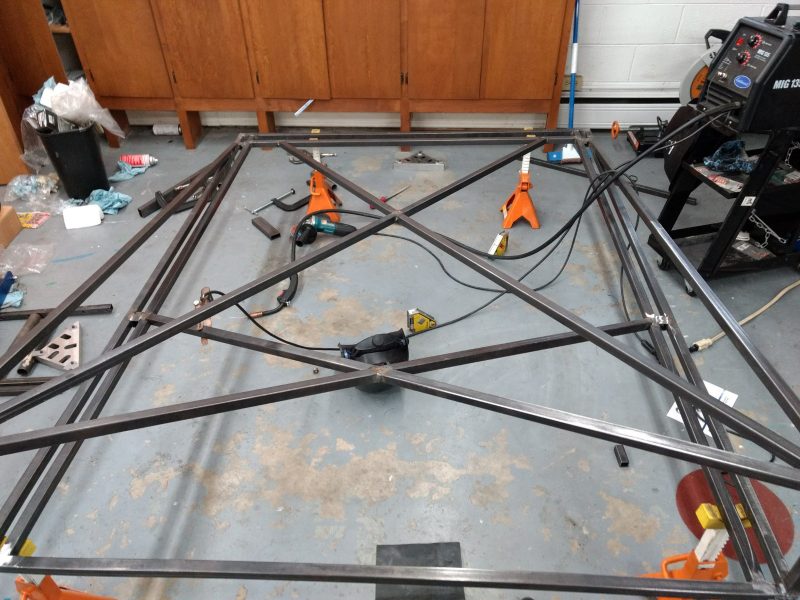
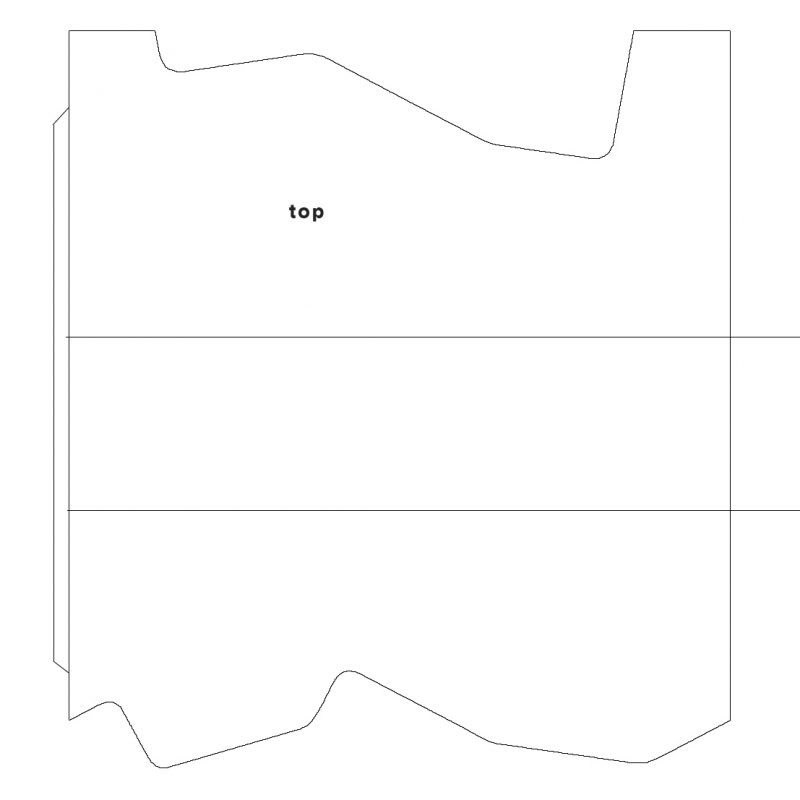
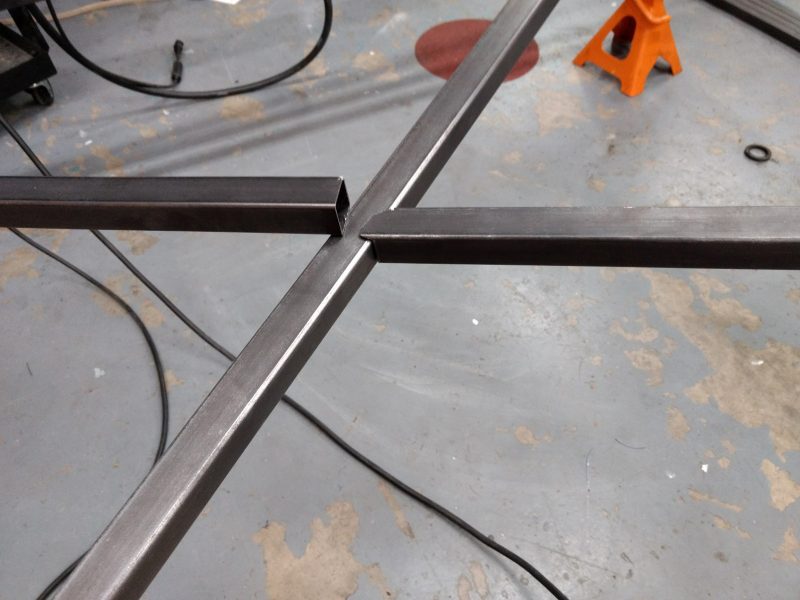
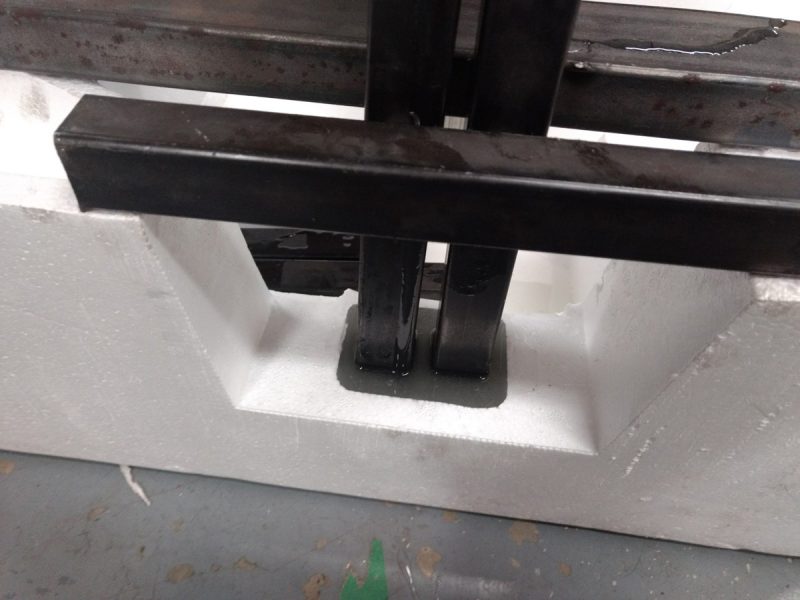
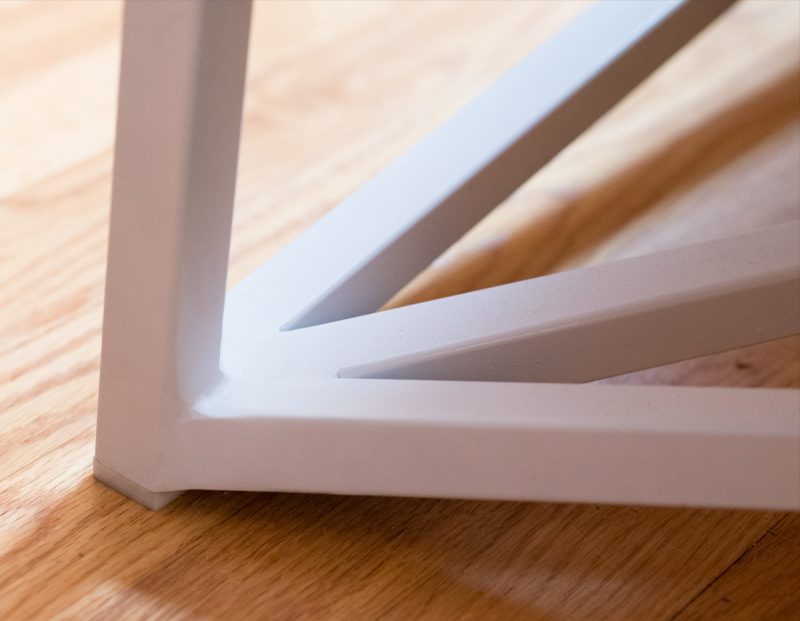
Fabricating the frame was straight forward. This is all 16 gauge 1″ square tube. I made notch templates from my 3d files. The wood is mahogany finished with waterlox. When the finish is fully cured I will knock it down to a less glossy surface. I also cast some low profile urethane rubber feet to protect my floors and not ruin the look of the front legs.
The finished bed in place:
Building more storage for my shop
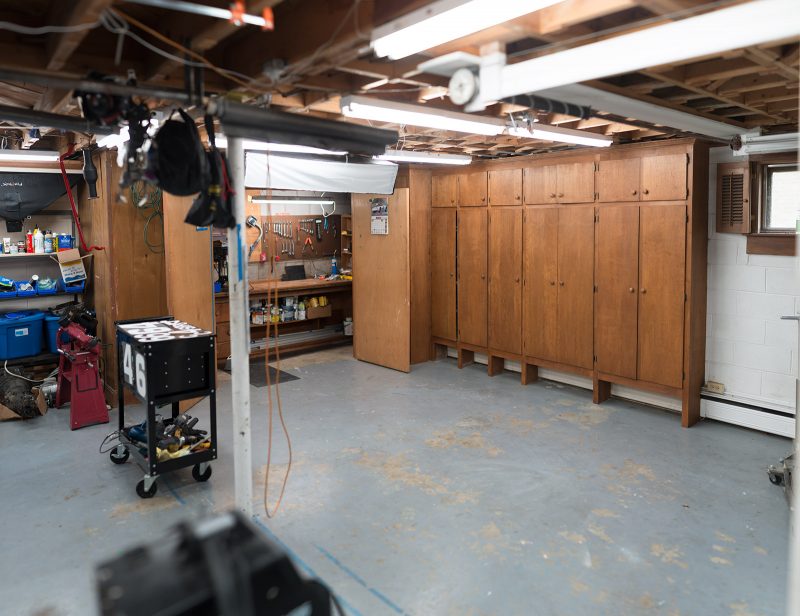
I do all of my work in a 570 square foot attached garage. The space needs to function as a photo studio, mechanics shop, a metal fab space, and occasionally I do composites work. In the last few years I reached a point where I had too many tools and parts to store and there was no way to get my space picked up and organized. Building content for this game involves storing a lot of parts which has made the problem worse.
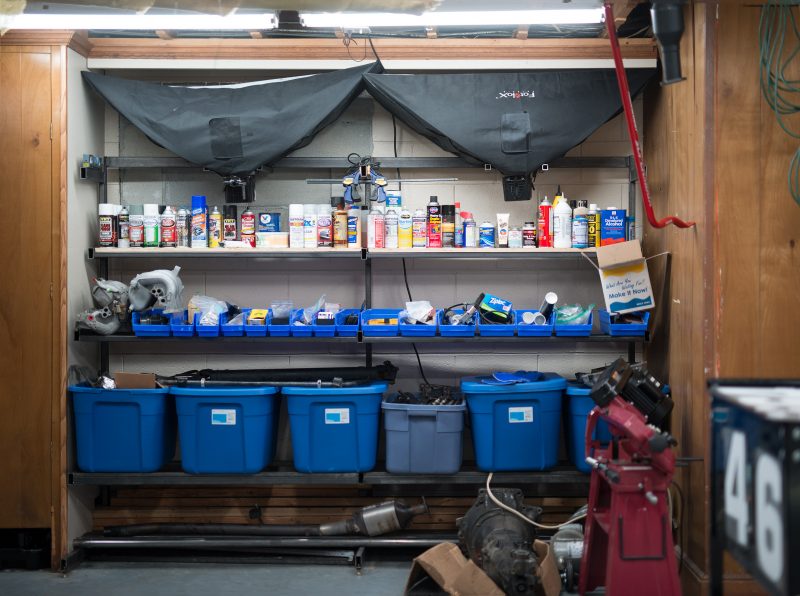
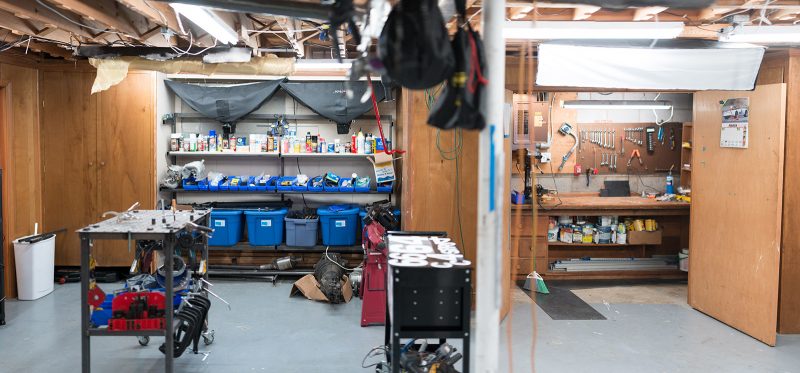
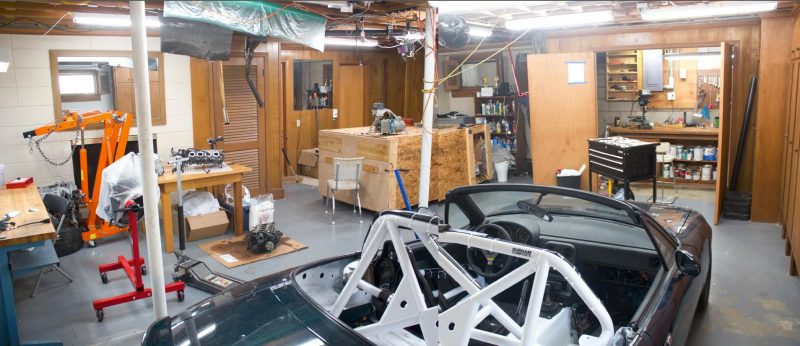
This panorama is a good before picture. The 4×8 OSB box is a composites curing oven I don’t use anymore- it was the first thing to go. The back wall has a bookshelf for cans, a filing cabinet, and junk piled around it. I decided to build a storage rack to make better use of that space.
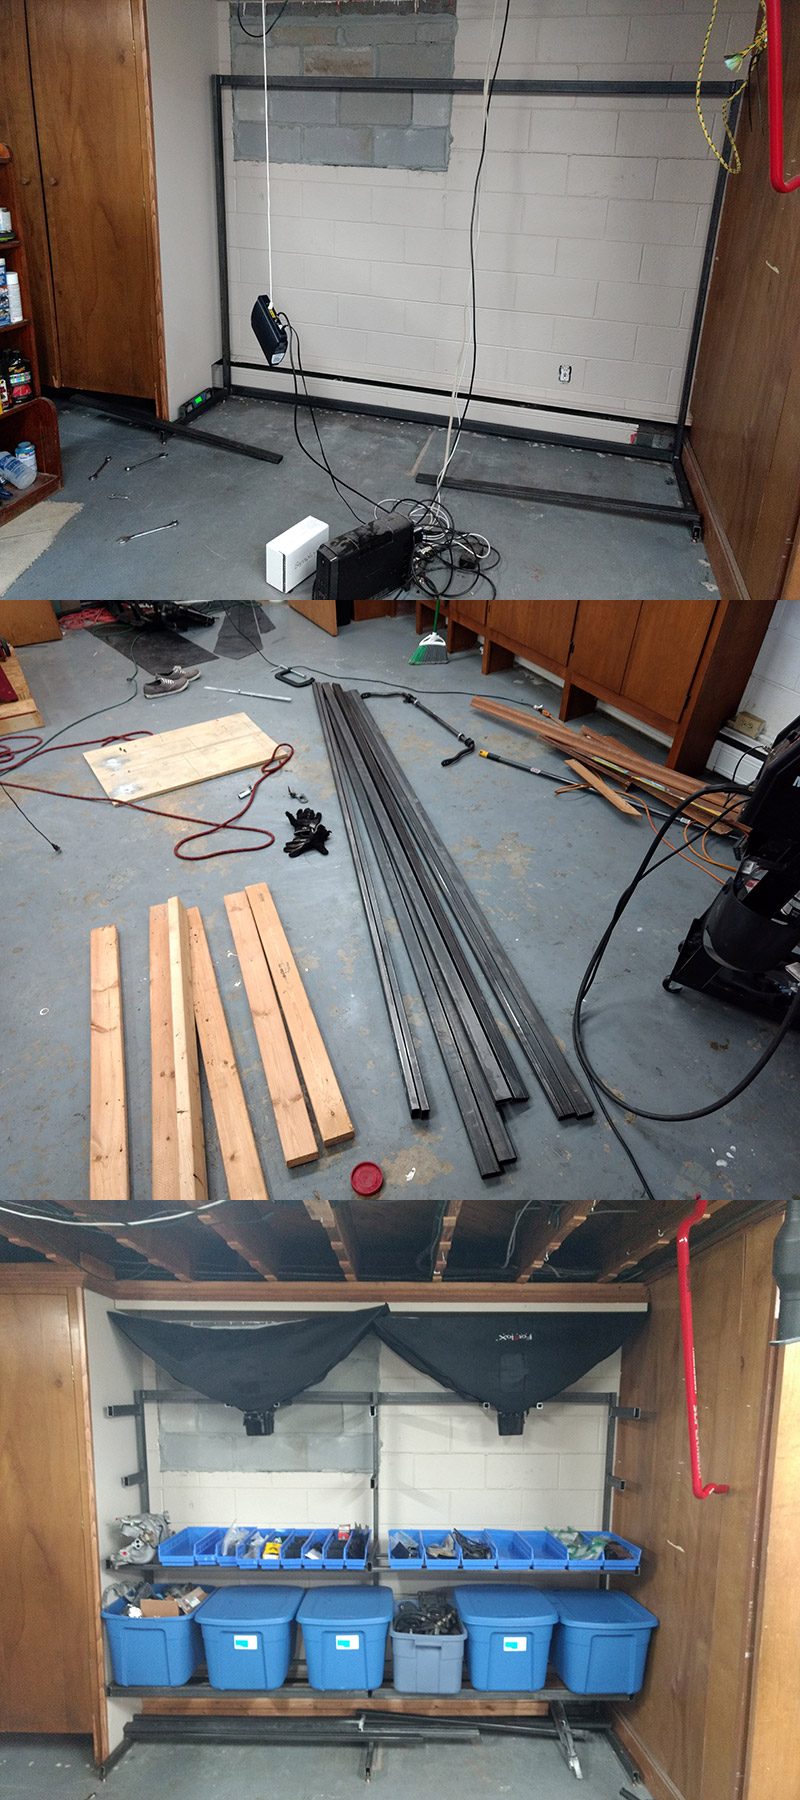
The total dimensions of the storage rack are 100″x62x24″. The bottom of the rack holds long stock, the next level up holds bins which are each large enough to hold a shortblock. Above that I have small parts bins, then a shelf for cans, and storage for the monolights I use for scanning. I can probably sneak some small shelves into the negative space between the lights.
This is the finished rack. I also added some t8 lighting on a switch:
All of this new storage has allowed me to reorganize my space. The area I use to work on cars is now much cleaner:
The back wall of my shop is more open and usable than it has been in years:
What I have been doing since I posted the prototype video
The prototype video got a huge reaction, way beyond my expectations. Different versions of that video have been viewed over six million times. It is really vindicating to see such clear evidence that there is an audience for this kind of game.
In the last few weeks I have been fixing bugs and improving the software side. This week I am back to building new content and my next task is the engine. I have a spare 2001 engine on a stand but its been cleaned up for install in my car. Building a digital version would involve complete disassembly, aggressive cleaning, then surface treatments on all the parts that would get scanned (block, oil pan, head, valve cover). I don’t want to fully disassemble the 2001 engine that is ready to be dropped into my car- That leaves me with finally doing my 1995 to 2001 engine swap and using my old 1995 engine. The earlier year engines are also a better fit for Wrench since I can skip the complexity of the VVT system.
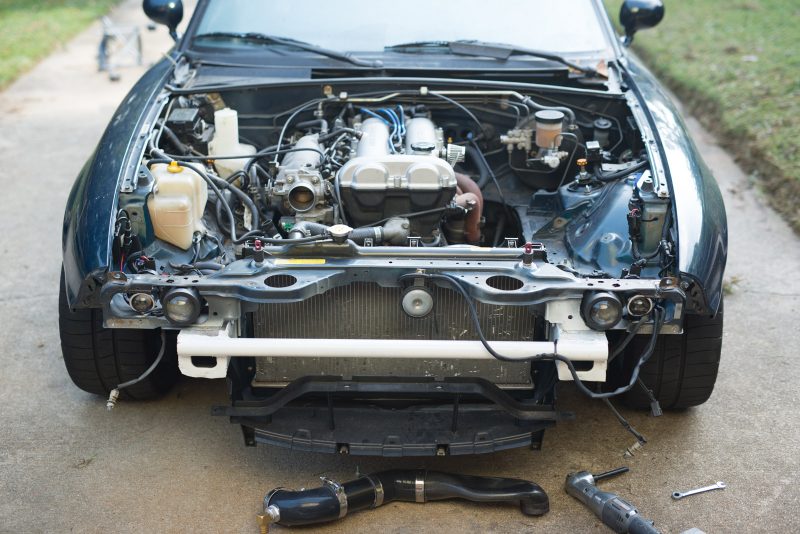
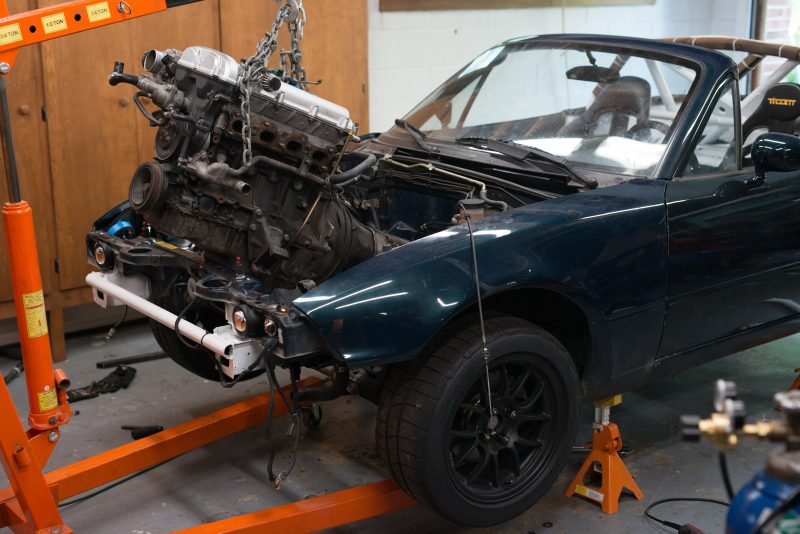
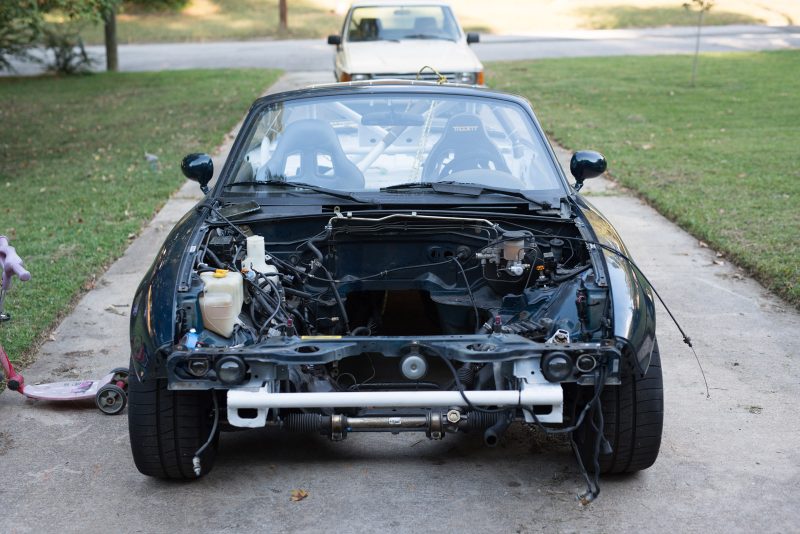
My car is particularly easy to work on with the modified front end, removed popup headlights, and lack of accessories (no ac, no power steering). Here are some images of the engine coming out:
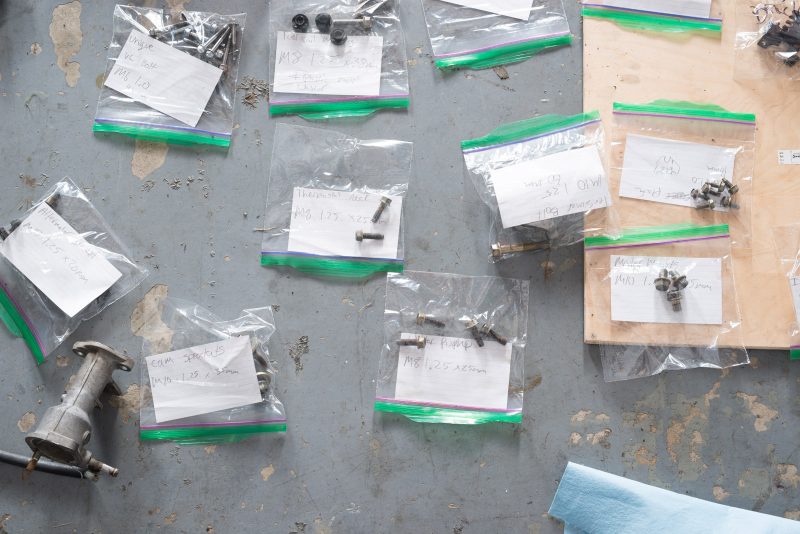
With the engine removed, I need to thoroughly clean every part, and take good notes so I know where everything goes. I measured the threads and length of every fastener so I could more quickly model them and identify re-use. I will probably end up adding a bolt head size to the measurements in another pass since I will need that to know what size wrenches will fit the fasteners in game:
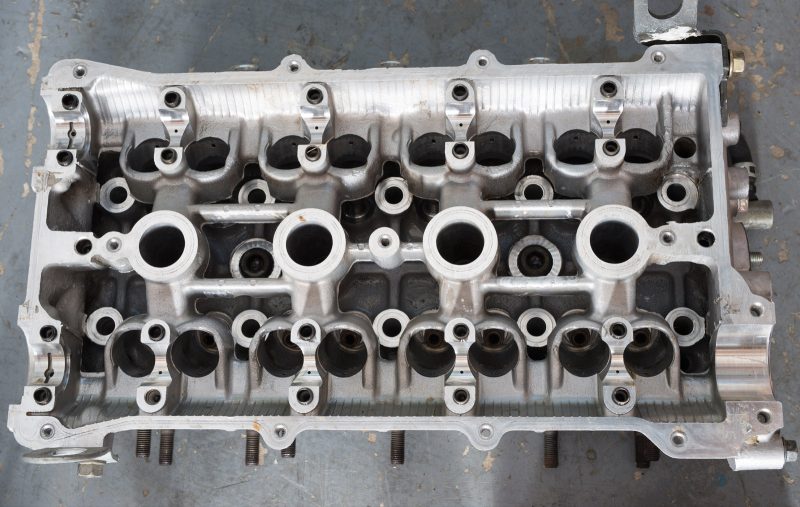
This is the head after a first pass of degreasing. I’m using simple green (not aluminum safe, but this head will never go back into a car) and a cheap pressure washer. The surface treatment I use for scanning will absorb any oil and turn dark. The surfaces need to all be very clean.
Lastly, here is a image of all the cylinder head parts + clutch parts on my garage floor:
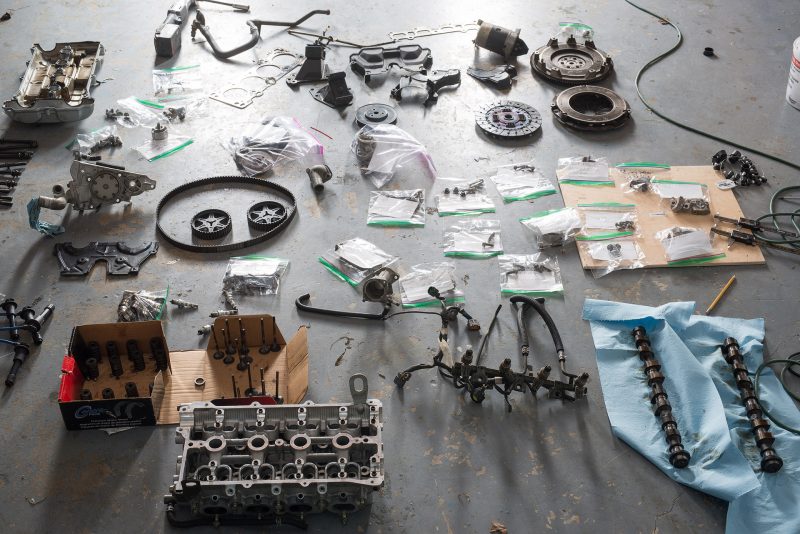
I’m going to try and finish the cylinder head before moving onto the bottom end, which will have a similar number of parts.
Wrench Announcement and Prototype 1 Video
The last two weeks have been busy. I finished my first large prototype milestone and have officially named my game Wrench. I am entering the phase of development where I want increased exposure. If you have been following my development, please share this.
My friend Matt Kohr put together this logo for me:
I also spent some time using Unreal’s new spectator screens for VR to make this video showing off the prototype:
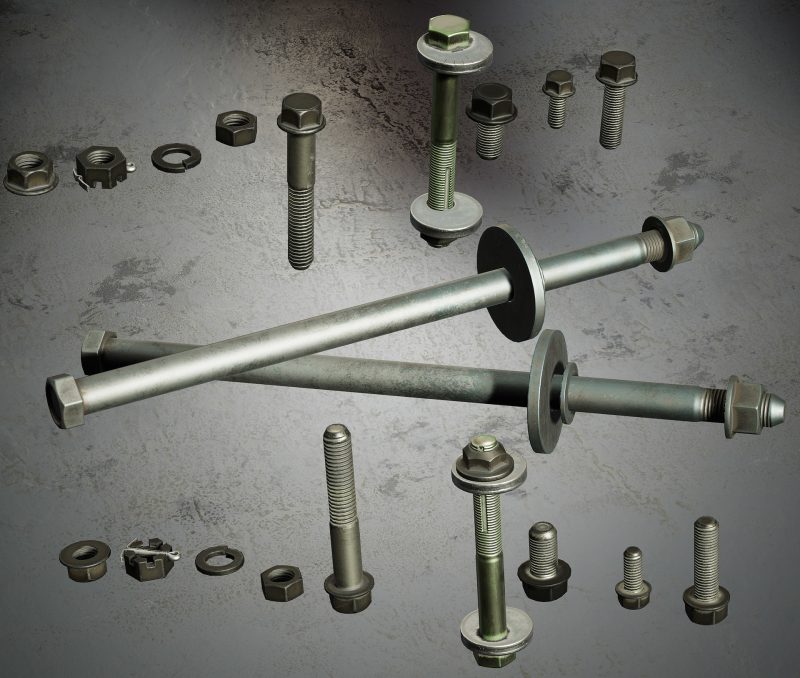
Lastly, I added a media section to this blog where I will stick high res images of the art. Among the images I uploaded is this 4k wallpaper image that shows all of the parts currently working in the game:
I ended up making substantial changes to all of the gameplay systems and added a bunch of new functionality which I will detail in another post later.
Implementing content and finding out my gameplay systems were broken
The next step is taking all my art content and getting it set up with the pickup and snapping system I have already posted about. For VR, it’s best to do as little as possible in tick events. Current VR headsets run at 90 frames per second and future headsets my run at higher framerates. For that reason, I built all of my functionality to work using Begin and End Overlap events. Basically, when car part type objects intersects another car part object it executes the system of communicating between parts to find out what is or isn’t installed, and then runs the logic to allow install or removal of the part when the the correct criteria are met. This seemed to work well in testing but when I started implementing my content I quickly noticed the status of what parts were installed, allowed to be installed, and allowed to be removed were not being updated reliably. This manifested itself as parts that said they could be removed when they should have been captive, or the game erroneously preventing installation. My game is essentially a whole lot of pieces trading and checking yes/no values. Figuring out where the systems were breaking down took me a few days and these were the major causes:
I stopped using overlap events for pickup since it wasn’t precise enough (I detailed that one of the other posts). When the player pulls the trigger to pick up an object I use a sphere trace instead of an overlap. I was still checking overlap of a capsule collider in order to set the hand status to “can pickup” which is a subtle hand animation and a recoloring of the pickup indicator to show if an object can or can’t be removed or picked up. I had this capsule on it’s own collision channel and the parts had extra collision boxes on a matching channel. I had thought having separate channels would prevent any interference. In retrospect, the event is On Overlap, not On Overlap of Channel. Any time there was unintended overlap event from this capsule collider the execution loop for snapping and updating variables would get disrupted. Depending on the shape of the collision volumes and way the parts were being held, this problem may or may not have manifested which made figuring out what was happening confusing. The solution I came to was to replace the capsule collider with a trace at a regular interval (every .2 seconds works well)
When two parts overlap I do a sphere trace that is about a meter wide to get references to nearby parts. When I set this up I accidentally used simple sphere trace. Unreal has two categories of traces. A simple trace which only returns the first actor it hits and a multi trace which returns a list of all the actors that the trace intersected. In testing I didn’t notice the mistake because I was only working with a few objects at a time and the actor it returned happened to be the correct one. Switching that out for a multi sphere trace allowed me to loop through a list of actors and get information from all of the nearby actors. Like the last issue, this one presented itself intermittently depending on position of all the actors in the area.
This one seems obvious in retrospect but took me several hours to figure out. When the overlap event begins, I get references to nearby objects and check the necessary objects to see what is or isn’t installed. For installation, I check to see if the parts it attaches to are currently installed along with any specific criteria I decide (does the player have access to it? Is it realistic or practical to allow install?). For example, if the player installed a coilover shock in the car without a spring in it, I’m not going to allow them to install that spring until the shock is removed from the car and the top hat is off of the shock. AllowRemoval works the same way, I check nearby objects and decide if the part is captive or should be allowed to be removed. After the part is snapped in place, I change the part’s status to Installed. Other parts check this installed status when their overlap events occur and the system seemed to work well. The issue is that for AllowRemoval this doesn’t actually make sense.
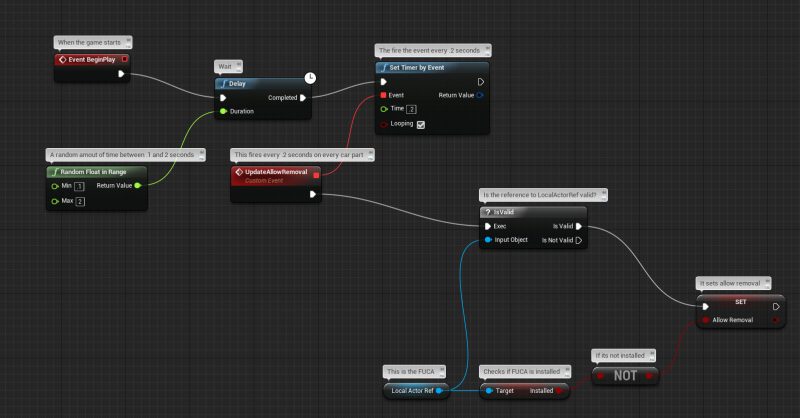
None of these issues were particularly difficult to fix but they way they interacted with each other made figuring them out challenging. Because they were intermittent, it was hard to tell where one issue started and another began. When it seemed like I knew what breaking the game, the fix didn’t do what I expected, or the debug messages seemed to be firing without a clear reason. The takeaway for me is to test my systems with more complicated content that replicates how the game will actually work and don’t assume that a system is only broken for one reason.
I am moving on to implementing these systems with all of my art content. This means I am making hundreds of copies of the child class BP and editing the details for each part. I did some cleanup and color coding to make that process quicker:
Tutorial: Photogrammetry Rubble Prop
I wrote this tutorial for my personal website earlier this year but I am moving it to this blog for it’s faster servers and because writing a follow up guide covering what I have learned building models for this game.
Equipment
- Nikon D800E with a Sigma 50mm 1.4
- 2 320 Ws monolights
- Strip Boxes
- 1/2″ Drywall
- Matte spraypaint
Software:
- Reality Capture
- Adobe Bridge or Lightroom
- Zbrush
- 3dsmax
- Handplane Baker
- Substance Painter
- Unreal Engine 4
Basics
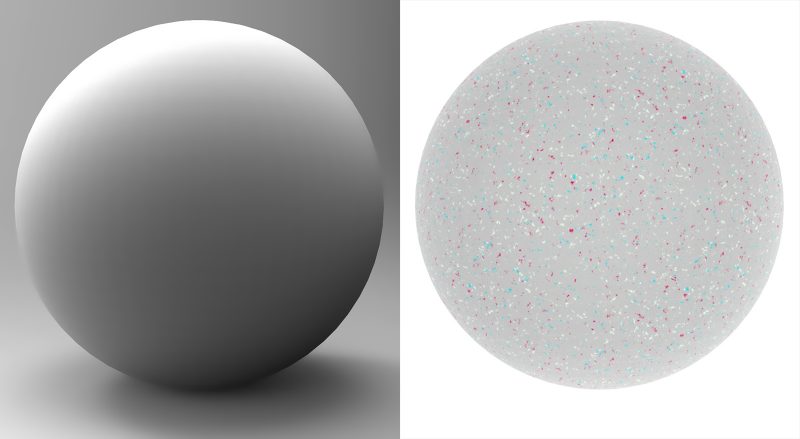
Before we can get into setting up materials or taking photos, it is important to understand how photogrammetry works. Photo based 3d scanning attempts to match points between images. After finding a matching point in multiple photos the software is able to calculate a coordinate. This process is repeated millions of times and you end up with a point cloud that represents the form of the object. We see form/volume based on light and shadow but photogrammetry does not. The software is just looking for points that it can match between images.The image below illustrates this difference. To our eyes the circle on the left is immediately readable as a sphere. For photogrammetry software images like this are confusing and will not produce good scan results. The sphere on the right is much closer to the kind of information the software can use. The lighting is very flat and there are many surface details that can be matched up between photos. The perfect photos for photogrammetry are totally sharp, no out of focus areas or camera shake, consistent in exposure and white balance between images, have no reflective or transparent surfaces that change appearance with angle, and show no sensor noise. You also need detail in all the shadows and highlights. If a highlight is blown out or a shadow is underexposed there is no usable information.
The Base Plate
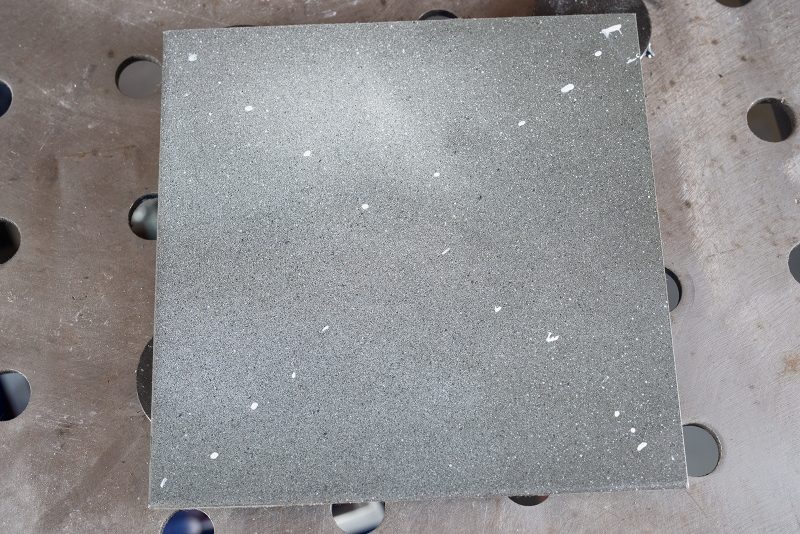
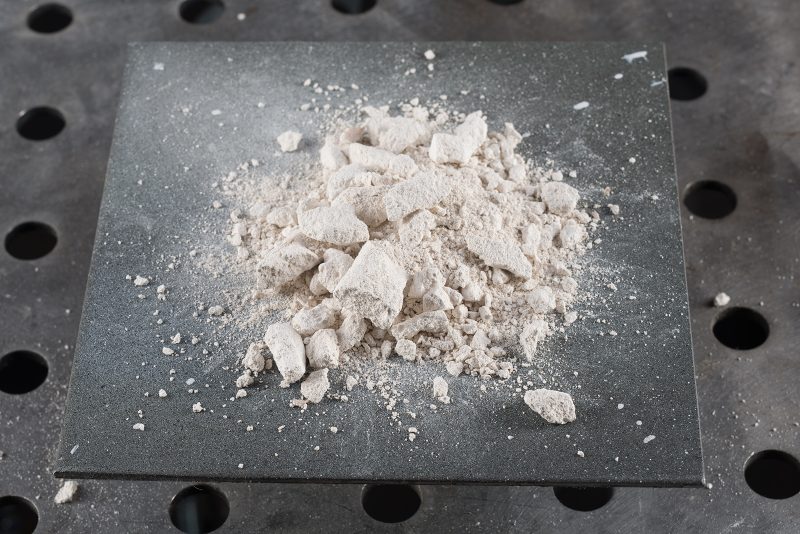
I’m using a 6”x6” steel plate that is reasonably flat. The flatter the surface the better. I prepped the surface of the plate by dusting it with 3 different colors of matte spray paint and then I took a toothpick and dabbed some white reference points in an X pattern. The white dots will provide landmarks for manual setting control points. The flatter your plate, the easier it will be to mask the rubble off of the surface.
Rubble Setup
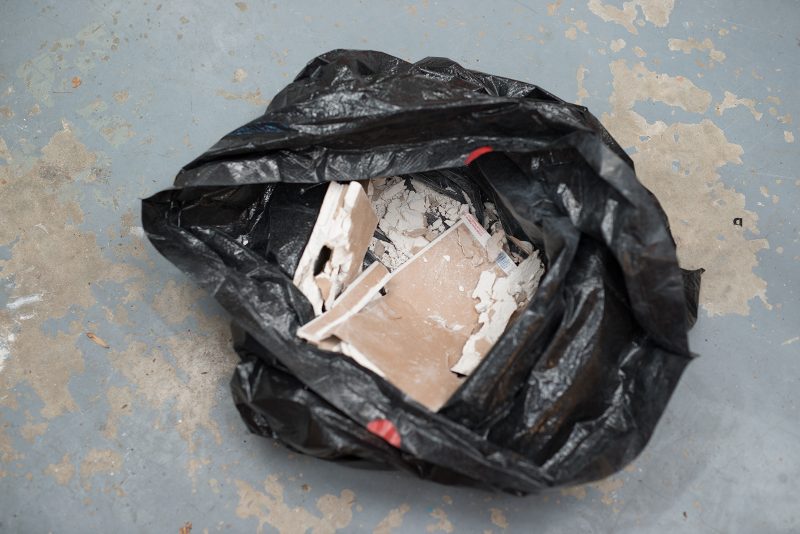
I’m using broken up pieces of half inch drywall. Since drywall breaks into very fine particulates, a small pile makes a convincing stand in for full sized debris. Break the drywall in a bag then sort out different sized pieces that you want to use. You want to pick out a good mix of sizes. Also grab some of the dust. Avoid or clean off as much of the backing paper as possible. Super thin surfaces will make it into the scan and will not translate to a low poly model or bake well. If any paper makes it into your scan you will need to clean it up in zbrush.
Pose your rubble by dumping your drywall pieces onto the plate. Usually I pour the debris several times and manipulate it with my hands until I have something I like. If you can see clear signs of hand manipulation at this stage, you will also see it in the final result.
Lighting
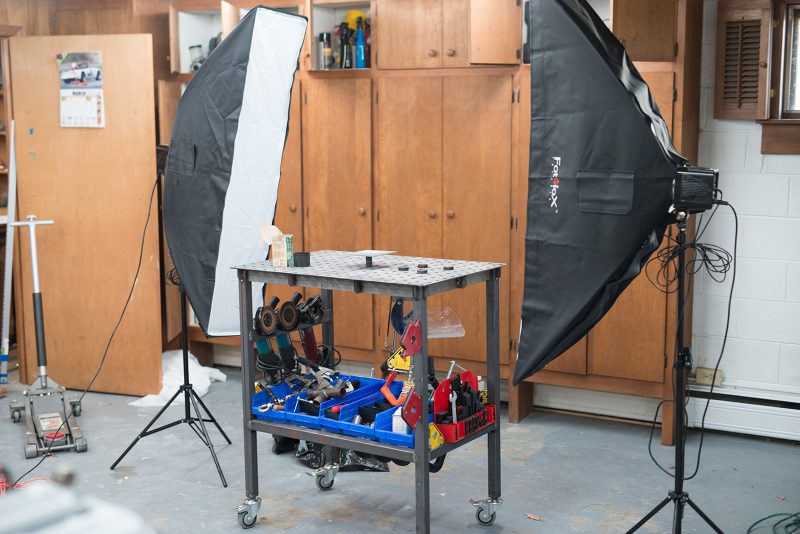
I’m using two 320 Ws monolights with strip boxes for diffusion. You can get away with much smaller flash units, I have these turned down to 1/8 power when shooting small objects. Also strip boxes provide enough diffusion without taking up too much space. You want to avoid positioning yourself between the lights and the subject so that you don’t cast shadows. A full sized softbox would block access for taking photos.
If you don’t have any lighting equipment use open shade on a bright day and a tripod as I described above.
How to set up your camera
Set your ISO to the minimum practical setting for low noise (usually ISO 100).
Set your camera to manual exposure mode and manual white balance
Set your camera to shoot in raw
Stop down to ~f11. This will get more of rubble in focus at once
Most people don’t have off camera flash units (on camera flash or any moving lighting is a big no no) and are going to be shooting with continuous lighting. If this is the case, you need a decent tripod and a cable release. Also set mirror lockup on your camera. Your exposure times are going to be very long and you will need to wait for the tripod to settle between each image. If you do have access to flash photography you can handhold all of your images and shooting will only take a few minutes.
Shooting
Shoot a test exposure to make sure the camera is set correctly. Check the histogram and make sure no highlights are being clipped and that you have shadow detail.
Start at a comfortable eye level and take photos a few inches apart circling the object. You should end up with about 30 images for your first pass. Follow this up with additional passes from a low and high angle. After you have 3 initial circles of photos I come in closer and try to get detail shots. Also, start shooting at two focus depths, once focused on the back edge of the rubble, and once focused on the front edge. Even at f/11 only portions of the rubble will be in focus at a time. For this rubble pile I ended up shooting 120 photos.
Processing the images
Start by loading your images into lightroom or bridge. Pixel peep your photos and make sure they are:
- Sharp
- Exposed correctly
- The subject fills the frame
- Clean, no sensor noise
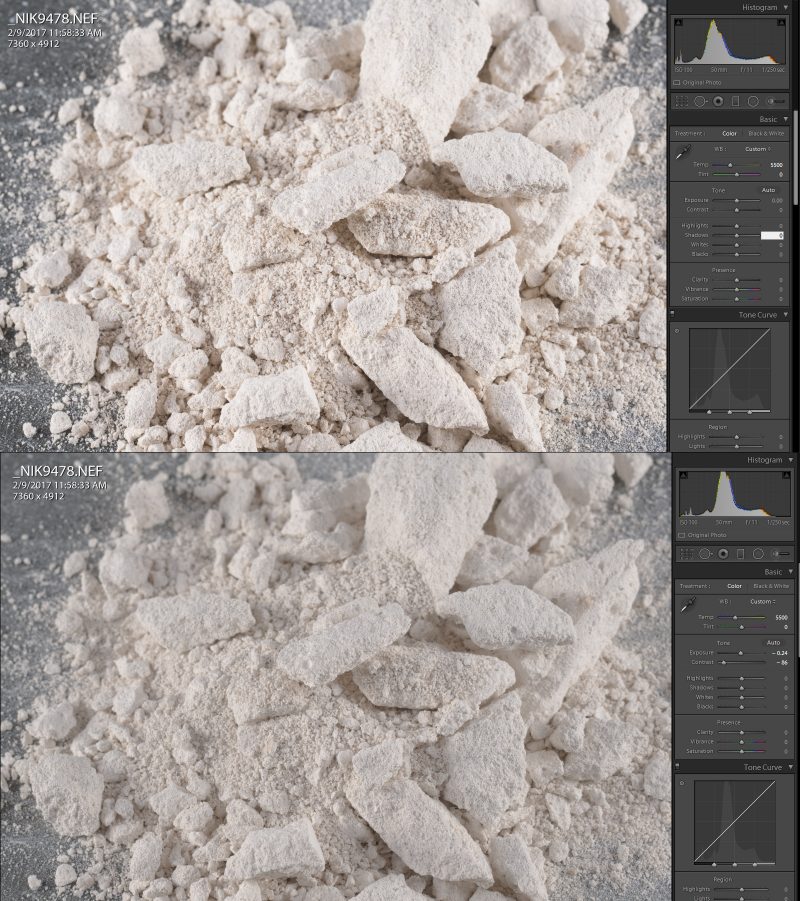
In my case the photos were about a half stop over exposed. I tweaked the exposure to bring back highlight detail. After that I adjusted the raw file settings to reduce the contrast.
I applied this raw profile to all my images and exported the files as tiffs. You can use max quality .jpg if you are concerned about storage space.
Reality Capture
Sculpt, Low, and Baking
Game update
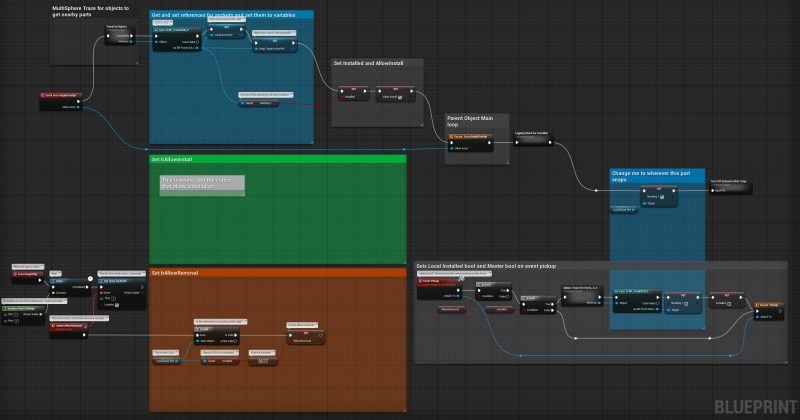
Over the last week I made a bunch of a new art and did polish pass on the gameplay system. In the prior gameplay systems posts I was working with a single variable that controlled install and removal called “bInstalled.” This was good for testing the flow of communication and getting the basic structure working, but in practice it only prevents the player from installing two parts into the same spot. I now use 3 boolean variables: bAllowInstall, bAllowRemoval, and bInstalled. These do exactly what they sound like. In each child object blueprint I collect bInstalled properties from all the necessary dependent parts and use them to set the status of bAllowInstall and bAllowRemoval. I only need to check dependencies one step removed so the lists are generally pretty short. This is an example of a child class blueprint:
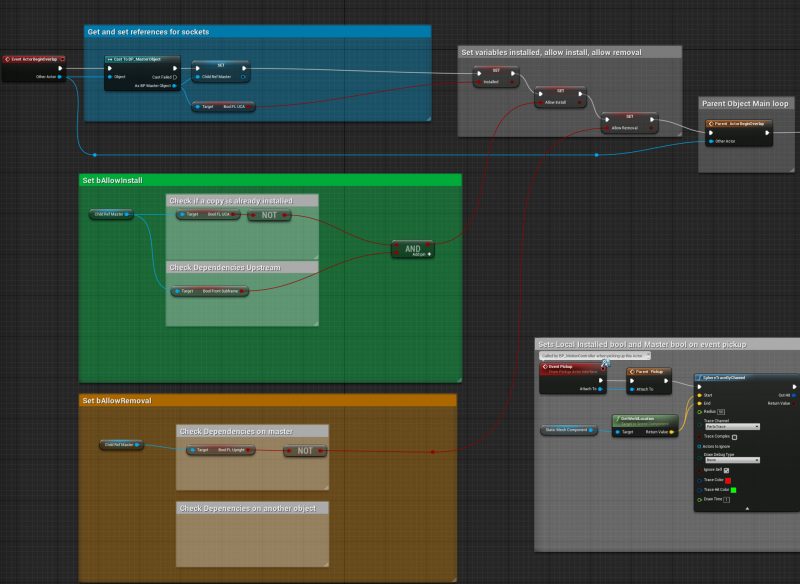
I also made some significant changes to how players pick up objects. In the Unreal VR template object pickups occur when a valid object overlaps a sphere that is hovering near the player’s hand. This is too cumbersome for grabbing small parts off of an assembly and it has a tendency to grab captive parts that shouldn’t be reachable. First I replaced the sphere with a narrow capsule to allow for tighter pickup targetting. This improved the “fat-fingering” issue but didn’t help with the captive part removal problem. A good example of this would be pulling the axle nut off of a hub without first removing the dust cap. To solve this I replaced the sphere overlap check with a ray cast from the hand. I also added a visual indicator to show the grabbing range and tell you if the part is allowed to be picked up or not. When the players hand is near a pickup object, I render a shaft of light coming from the players hand. When you pull the trigger to attempt a pickup, a ray is cast out of the hand and stops when it hits an object. If the object’s bAllowRemoval is set to true, the shaft of light turns green and you can pick up the part. If the bAllowRemoval is false the shaft turns red and the part stays where it is.
Here is a video:
Garage updates
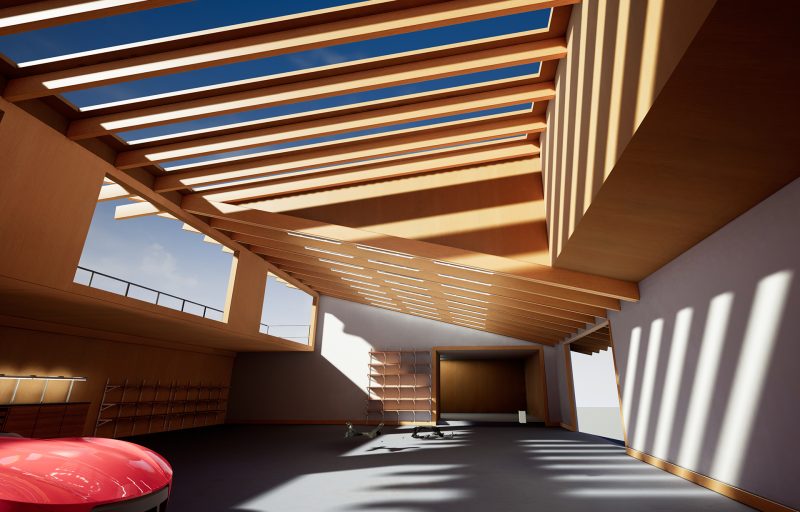
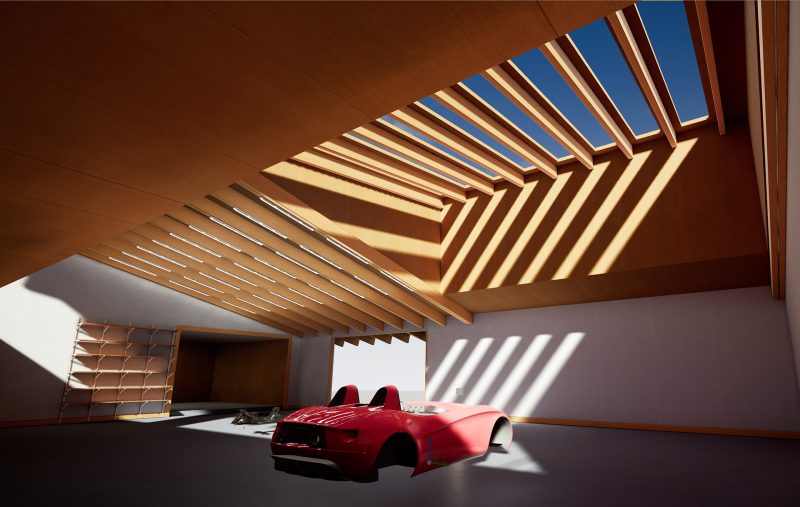
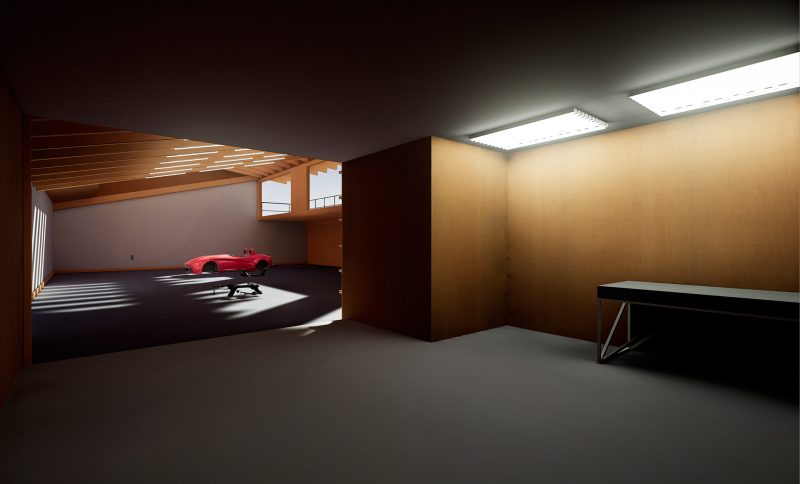
I made the garage bigger and brighter while adding more variety to the types of spaces. I’m still working at a sketch level of detail so that I can keep things flexible for future changes. I’ll do polish pass on the garage much later in development when I have a totally clear idea of what all the different spaces need to do.
On one end I added a small room, I think this is where the shop computer will live. This room is darker with lower ceilings and a slight step up between floors. Opposite of that, I raised the ceiling to bring in more light and create more space for a lift. After a few iterations of adding clerestory windows I settled on second roof running at a reverse pitch with skylights. This brings in a bunch of direct light which bounces around and brightens up the space.
Art Post- VR hands
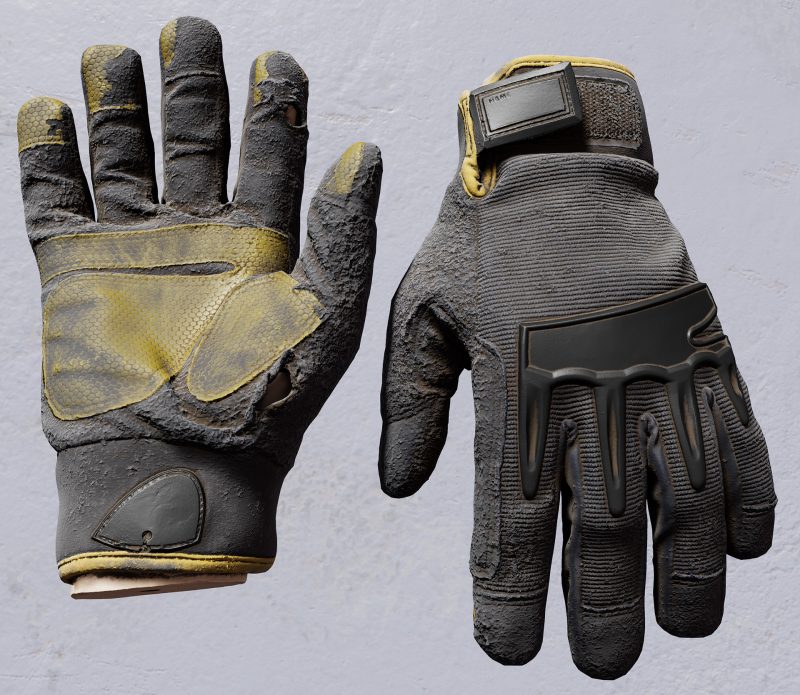
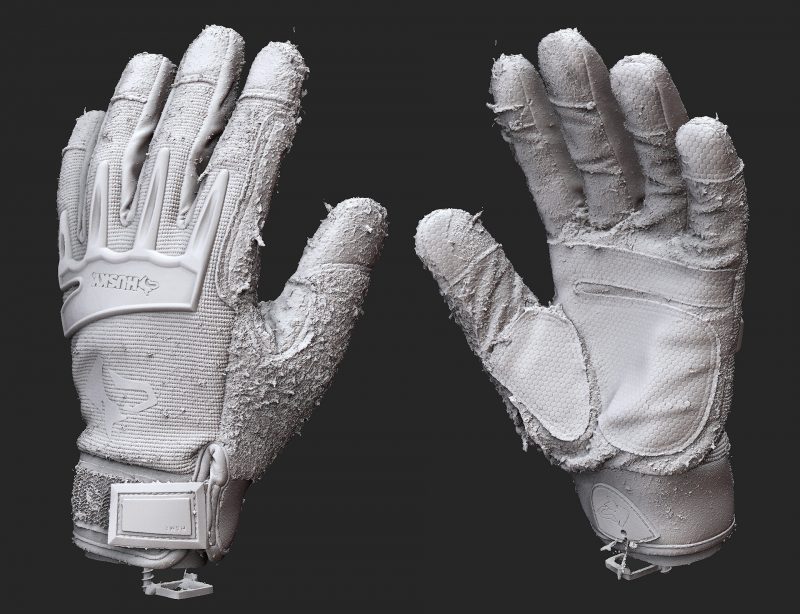
I wanted a nice looking set of replacements for the default Unreal hands but I didn’t want to take a week+ to build them in marvelous designer and Zbrush. Like with the car parts, I am using photogrammetry to get a high quality result quickly. The scan was about 350 photos process in Reality Capture. Building lowpoly meshes and UVs for organic models like this is much easier than with the car parts since the topology doesn’t need to sit dead on a bunch of sharp corners. Total production time on these hands from shooting photos to having them working in unreal is about 12 hours (scan was processed during non work hours).
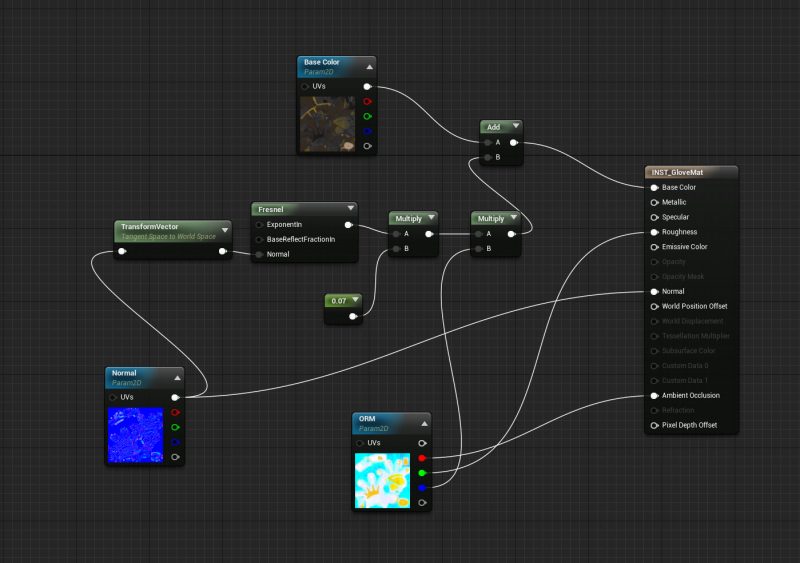
The textures were done in substance painter. I made a custom material in unreal that adds some fresnel to the albedo channel in order to help sell the look of fuzzy cloth. The metalness channel of my mask texture wasn’t being used so I am using the blue channel to mask between rubber and cloth areas.

